1. Pre-conditions
You need to use Google Analytics UTM tagging, including:
- utm_source
- utm_medium
- Utm_campaign
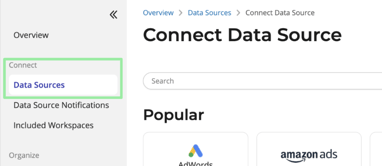
2. Connect your ad platforms
Navigate to the Connect section in Funnel. Given that you are using the campaign name in the utm_campaign, connect the data sources with the default config (or if needed on a more granular level). Follow this guide to learn how to connect your data sources in the Funnel app.
If the campaign names do not match the utm_campaign parameter, your data sources need to contain the final url's, destination url's. Those url's are available on Ad / Creative level.
3. Connect Google Analytics
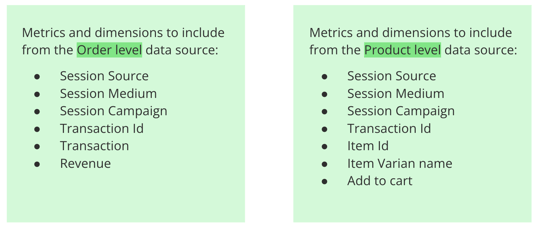
Connect two GA4 sources: one for Order level and one for Product level
4. Map data sources
Navigate to Dimensions under the Organize section in Funnel. Make sure the mapping between Google Analytics and your Ad platforms are working for Funnel's out-of-the-box fields:
- Traffic Source
- Paid/Organic
- Campaign
Resources:
General guide on how to map your data in Funnel
5. Create views in Data Explorer
Create 3 views in the Data Explorer by following the steps below.
- Find you The Workspace ID and copy it. It is found in the url when you are logged into Funnel according to image below:

- Add your Workspace ID in the field below and hit "Generate links"
- Open the first view by clicking "SiftLab - Cost"
- Save the view you just opened by clicking "Views" -> "Save as new…" and name it "SiftLab - Cost"
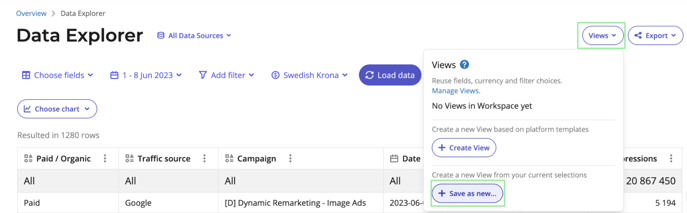
- Repeat the steps to create the two remaining views: "SiftLab - Product" and "SiftLab - Order". Each view should have corresponding names: "SiftLab - Product", "SiftLab - Order"
6. Share data to SiftLab
Navigate to Data Warehouse under the Share section in Funnel and create 3 different exports according to the following slides.
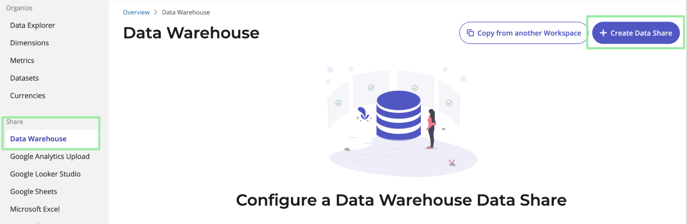
7. Data Share 1 - Cost
- 1. Click on "Create Data Share" and choose Google Cloud Storage
- 2. Enter "siftlab-funnel" in the Cloud Storage bucket name
- 3. Enter your SiftLab domain name in the Bucket path option. You can see your domain-name in the URL when you sign into Sift Lab.
- 4. Enter "cost/funnel_data_{startYYYY}_{startMM}" in the Filename template
- 5. Select View - SiftLab Cost

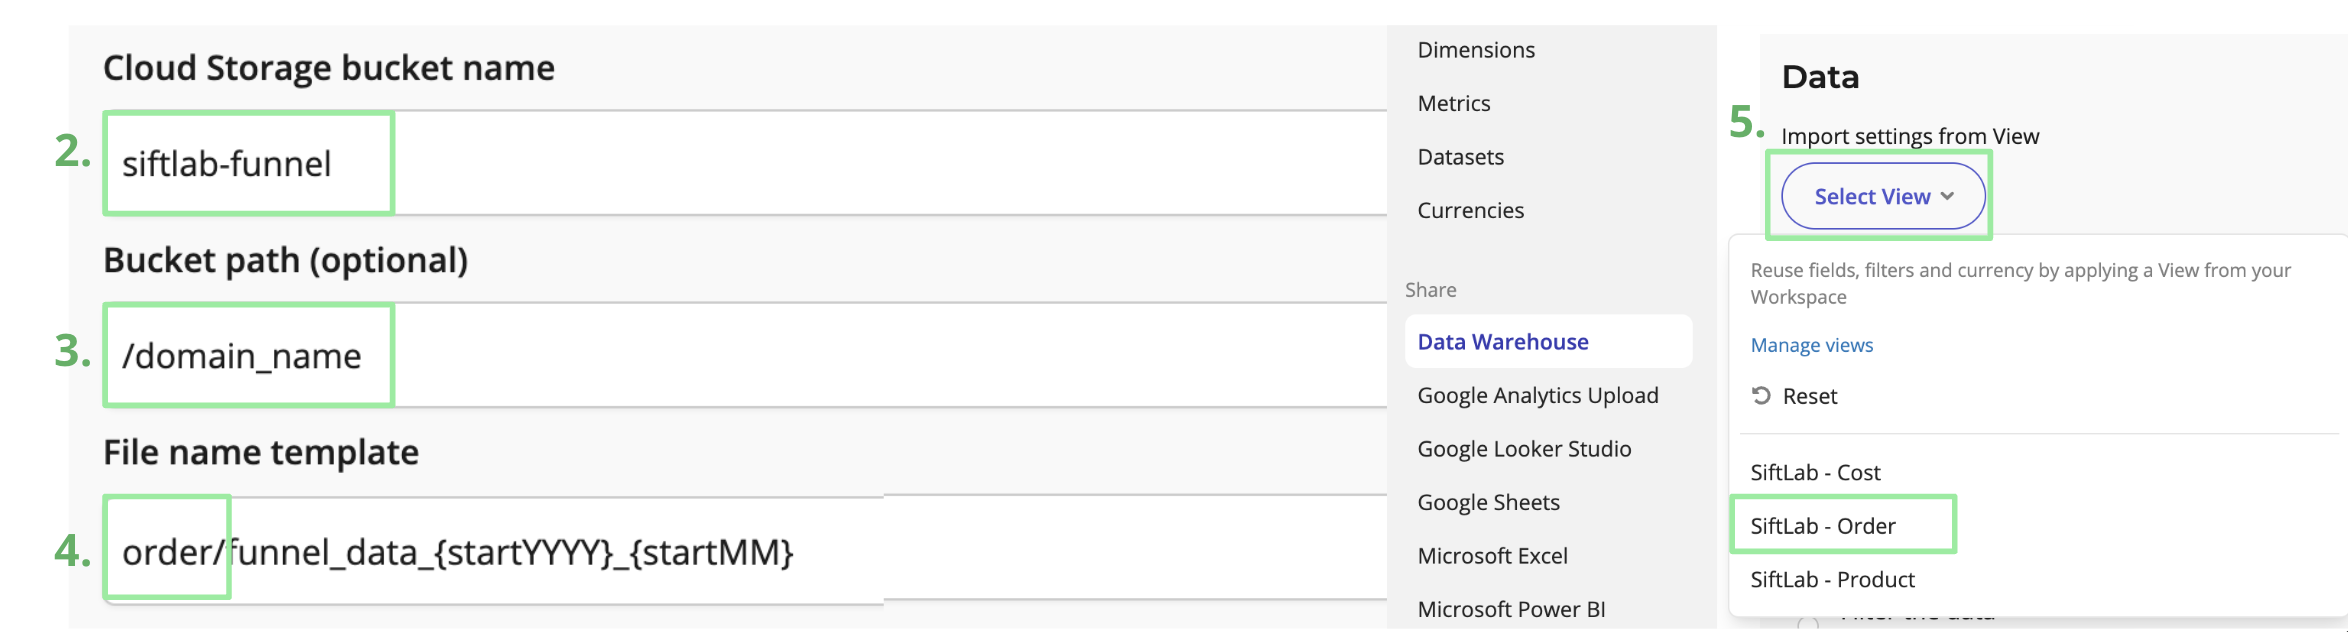
8. Data Share 2 - Order
- 1. Click on "Create Data Share" and choose Google Cloud Storage
- 2. Enter "siftlab-funnel" in the Cloud Storage bucket name
- 3. Enter your SiftLab domain name in the Bucket path option. You can see your domain-name in the URL when you sign into Sift Lab.
- 4. Enter "order/funnel_data_{startYYYY}_{startMM}" in the Filename template
- 5. Select View - SiftLab Order
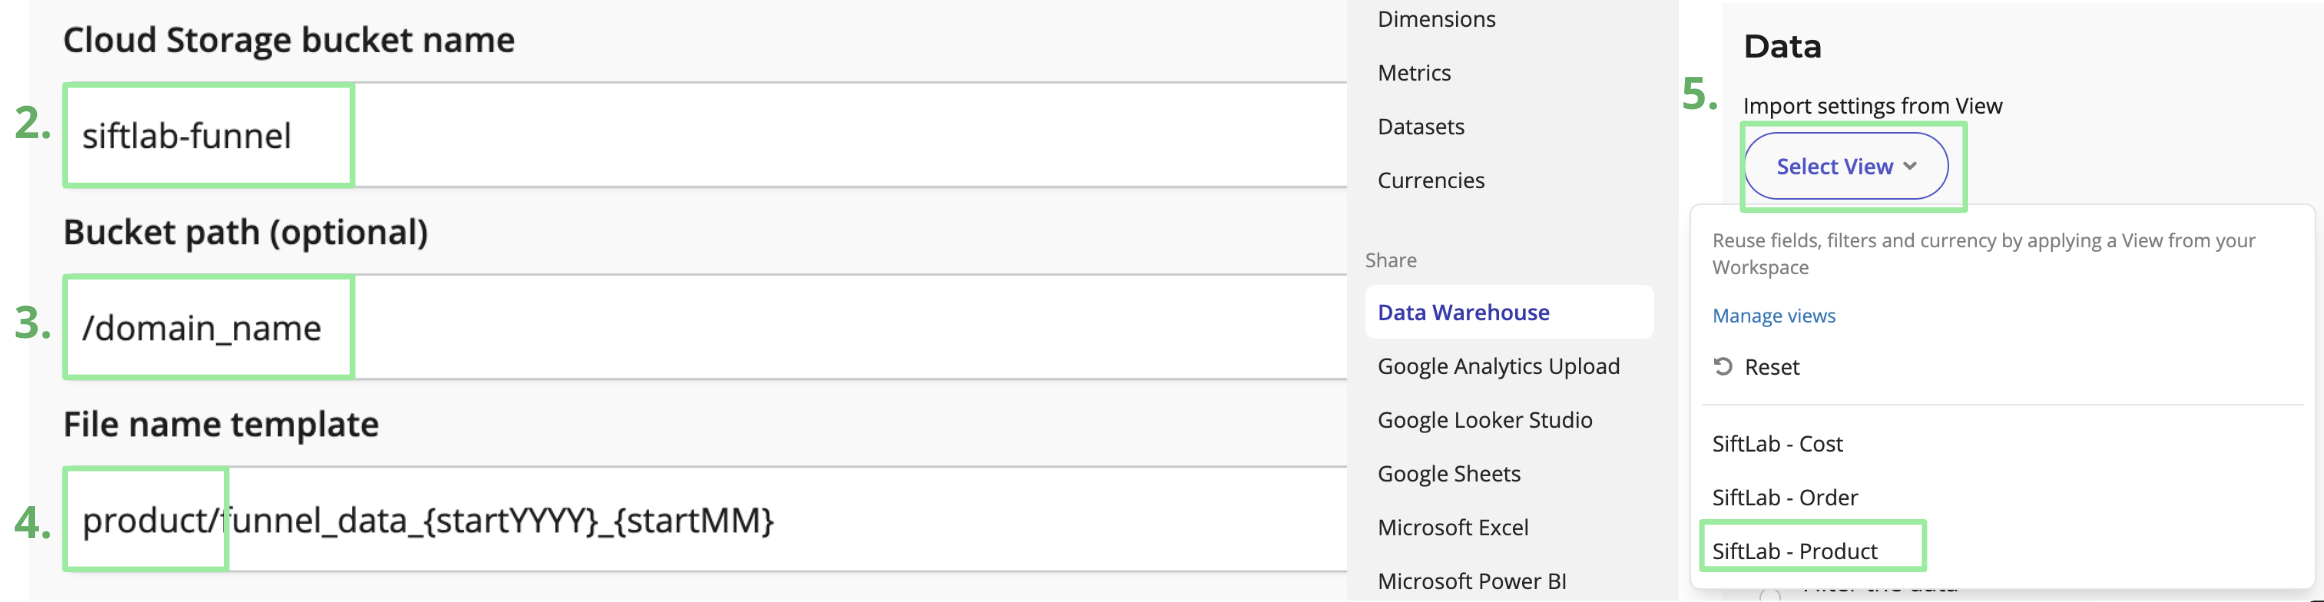
9. Data Share 3 - Product
- 1. Click on "Create Data Share" and choose Google Cloud Storage
- 2. Enter "siftlab-funnel" in the Cloud Storage bucket name
- 3. Enter your SiftLab domain name in the Bucket path option. You can see your domain-name in the URL when you sign into Sift Lab.
- 4. Enter "product/funnel_data_{startYYYY}_{startMM}" in the Filename template
- 5. Select View - SiftLab Product